Lesson 8: The Box Model
The Box Model
The box model...
...is a conceptual framework for understanding the series of CSS properties that affect elements' size, border, background, and spacing.
Working with CSS basic properties and typography so far has allowed us to learn the ropes of CSS and have a lot more control of how our content looks. But we haven’t had much control over layout adjustments yet. This topic will be covered in the next few modules as these skills involve several different layers. In this module we will lay the foundation by looking at the box model. In the next module we’ll talk about how to achieve more complex layouts using the float and clear properties. In the following two modules we’ll look at even more possibilities with relative and absolute positioning.
Read Ch. 13 from Duckett
for an explanation of many of the box model properties.Once again, the assigned reading from the Duckett textbook provided an excellent summary of the tools and concepts behind the box model. This set of CSS properties allows us to control the dimensions (width and height), white space (margin and padding), borders (border and related properties), and background colors and imagery (background and its related properties) to add even more visual finesse to our HTML elements (these will be covered in the upcoming Duckett reading from chapter 14).
Here is a table summarizing the properties, their uses, potential values, and common examples:
| Property | What it does | Value options | Examples |
|---|---|---|---|
width | Controls content box width | auto | amount in px, em, or % | width: 500px; |
height | Controls content box height | auto | amount in px, em, or % | height: auto; |
margin | Adds or removes outer whitespace (outside border) auto | amount in px, em, or % | margin: 10px 20px; |
padding | Adds or removes inner whitespace (inside border) | amount in px, em, or % | padding: 30px 10px 50px 40px; |
border-width | Controls the thickness of the border | amount in px | thin | medium | thick | border-width: 5px; |
border-style | Controls the style or type of the border | solid | dotted | dashed | double | groove | ridge | inset | outset | hidden | border-style: solid; |
border-color | Controls the color of the border | Color keyword, hex code, rgb(), rgba(), hsl(), or hsla() color code | border-color: #ef4520; |
border | Adds or removes border around content dimensions and padding | Shorthand that allows you to write all the border types in one property | border: 1px solid #000; |
background-color | Controls the color of a box’s background area, the area inside the border behind padding whitespace and content | Color keyword, hex code, rgb(), rgba(), hsl(), or hsla() color code | background-color: #ef4520; |
background-image | Allows us to specify an image to appear and possibly tile in the box’s background area | url('path/to/image.jpg') | background-image: url("images/logo.png"); |
background-repeat | Allows us to set if and how a background image will tile | repeat | repeat-x | repeat-y | no-repeat | background-repeat: no-repeat; |
background-position | Provides the origin location for a background image | xpx ypx | x% y% | left top | left center | left bottom | right top | right center | right bottom | center top | center center | center bottom | background-position: center top; |
background-attachment | Sets whether an image stays fixed as content scrolls or whether it moves with the content | fixed | scroll | background-attachment: fixed; |
background | Shortcut property to set all background settings at once | Any background property values separated by a space. | background: #fff url("image.png") repeat-y fixed left; |
box-sizing | Determines which box properties are included when width and height are set. | content-box is the default; border-box ensures that padding and borders are both included in dimension settings. | box-sizing: border-box |
Revisiting Block vs. Inline
We can convert between Block and Inline formatting...
...using the display property. This become helpful particularly when trying to apply box model settings to inline elements.
Earlier in the course we discussed how all HTML elements are either inline or block-level elements. It is important to note that box model styles behave differently for these. The simple statement is that the box model does not work on inline elements. The long statement begins with the fact that browsers allow different box-model settings on inline elements and interpret them differently. So, favoring the simple statement in this introductory course, avoid using box-model settings on inline elements.
However, a CSS property allows you to convert elements to block-level elements (or to inline if desired): the display property. This accepts the several values including block, inline and none.
display: blockconverts an element to a block-level element. This is very helpful, particularly with elements such as hyperlinks that are part of a navigation list. This way we can addpaddingaround the link and set a background color, then use the: hoverpseudo-class to provide an altered appearance when the user hovers over the link.display: inlineconverts an element to an inline element. This is occasionally helpful such as when you have an<h1> and a<p>inside a<header>. If the<h1>is the brand and the<p>is a tagline and you want them to appear on the same line, you could set them both todisplay: inline. However, many times it is more effective to use thefloatproperty or flex box to get elements to appear side-by-side—and that is covered in the next module.display: nonemakes an element altogether invisible. This can be helpful when adding interactive elements later in your studies or for toggling the visibility of certain elements in responsive web design (which is covered later in this course).
Simplifying Box Dimensions
The 'box-sizing: border-box' setting...
...allows us to simplify controlling and calculating box dimensions because it ensures padding and border are included inside an element's width and height setting instead of outside these.
The box model is very helpful for understanding the properties that contribute to any element’s size, spacing, stroke and fill. One trick to note is the relationship between spacing, border and size properties in relation to controlling an elements overall dimensions.
First of all, note that by default, margin, padding, border and width/height all add up to create the box’s total dimensions. For example, what are the total width and height of this element:
.box {
    width: 500px;
    height: 150px
    margin: 10px 5px 10px 5px;
    padding: 10px;
    border: 1px solid black;
}
By default, width and height control the dimensions of the element’s content box (the actual area the text or other content fills) and then padding, border, and margin all wrap around that size.
So if we wanted to figure out the total width we'd need to run the following calculation:
 500px     (width)                     --> 500px
   5px × 2 (margin on left and right)  -->  10px
  10px × 2 (padding on left and right) -->  20px
+  1px × 2 (border on left and right)  -->   2px
-----------
 532px
The height would be the following:
 150px     (height)                    --> 150px
  10px × 2 (margin on top and bottom)  -->  20px
  10px × 2 (padding on top and bottom) -->  20px
+  1px × 2 (border on top and bottom)  -->   2px
-----------
 192px
If this seems overly complex, consider using the box-sizing property to simplify this a little.
But if you set this property...
box-sizing: border-box;...then the width and height settings control the total space from border to border. So in this model, only margin adds to this overall size.
So to modify the example above:
.box {
    box-sizing: border-box;
    width: 500px;
    height: 150px
    margin: 10px 5px 10px 5px;
    padding: 10px;
    border: 1px solid black;
}
Now the total width is simply:
  500px     (width)                    --> 500px
+   5px x 2 (margin on left and right) -->  10px
------------
  510px
border and padding are simply included in the 500px setting for width, so technically, the content box is now smaller (478px to be exact). This may be tricky at first, but I believe you’ll find it much simpler to get used to controlling box dimensions if you also use box-sizing: border-box.
Creating and Centering a Single-column Layout
Center elements from a layout perspective...
...using auto margin on left and right and setting a width on the element.
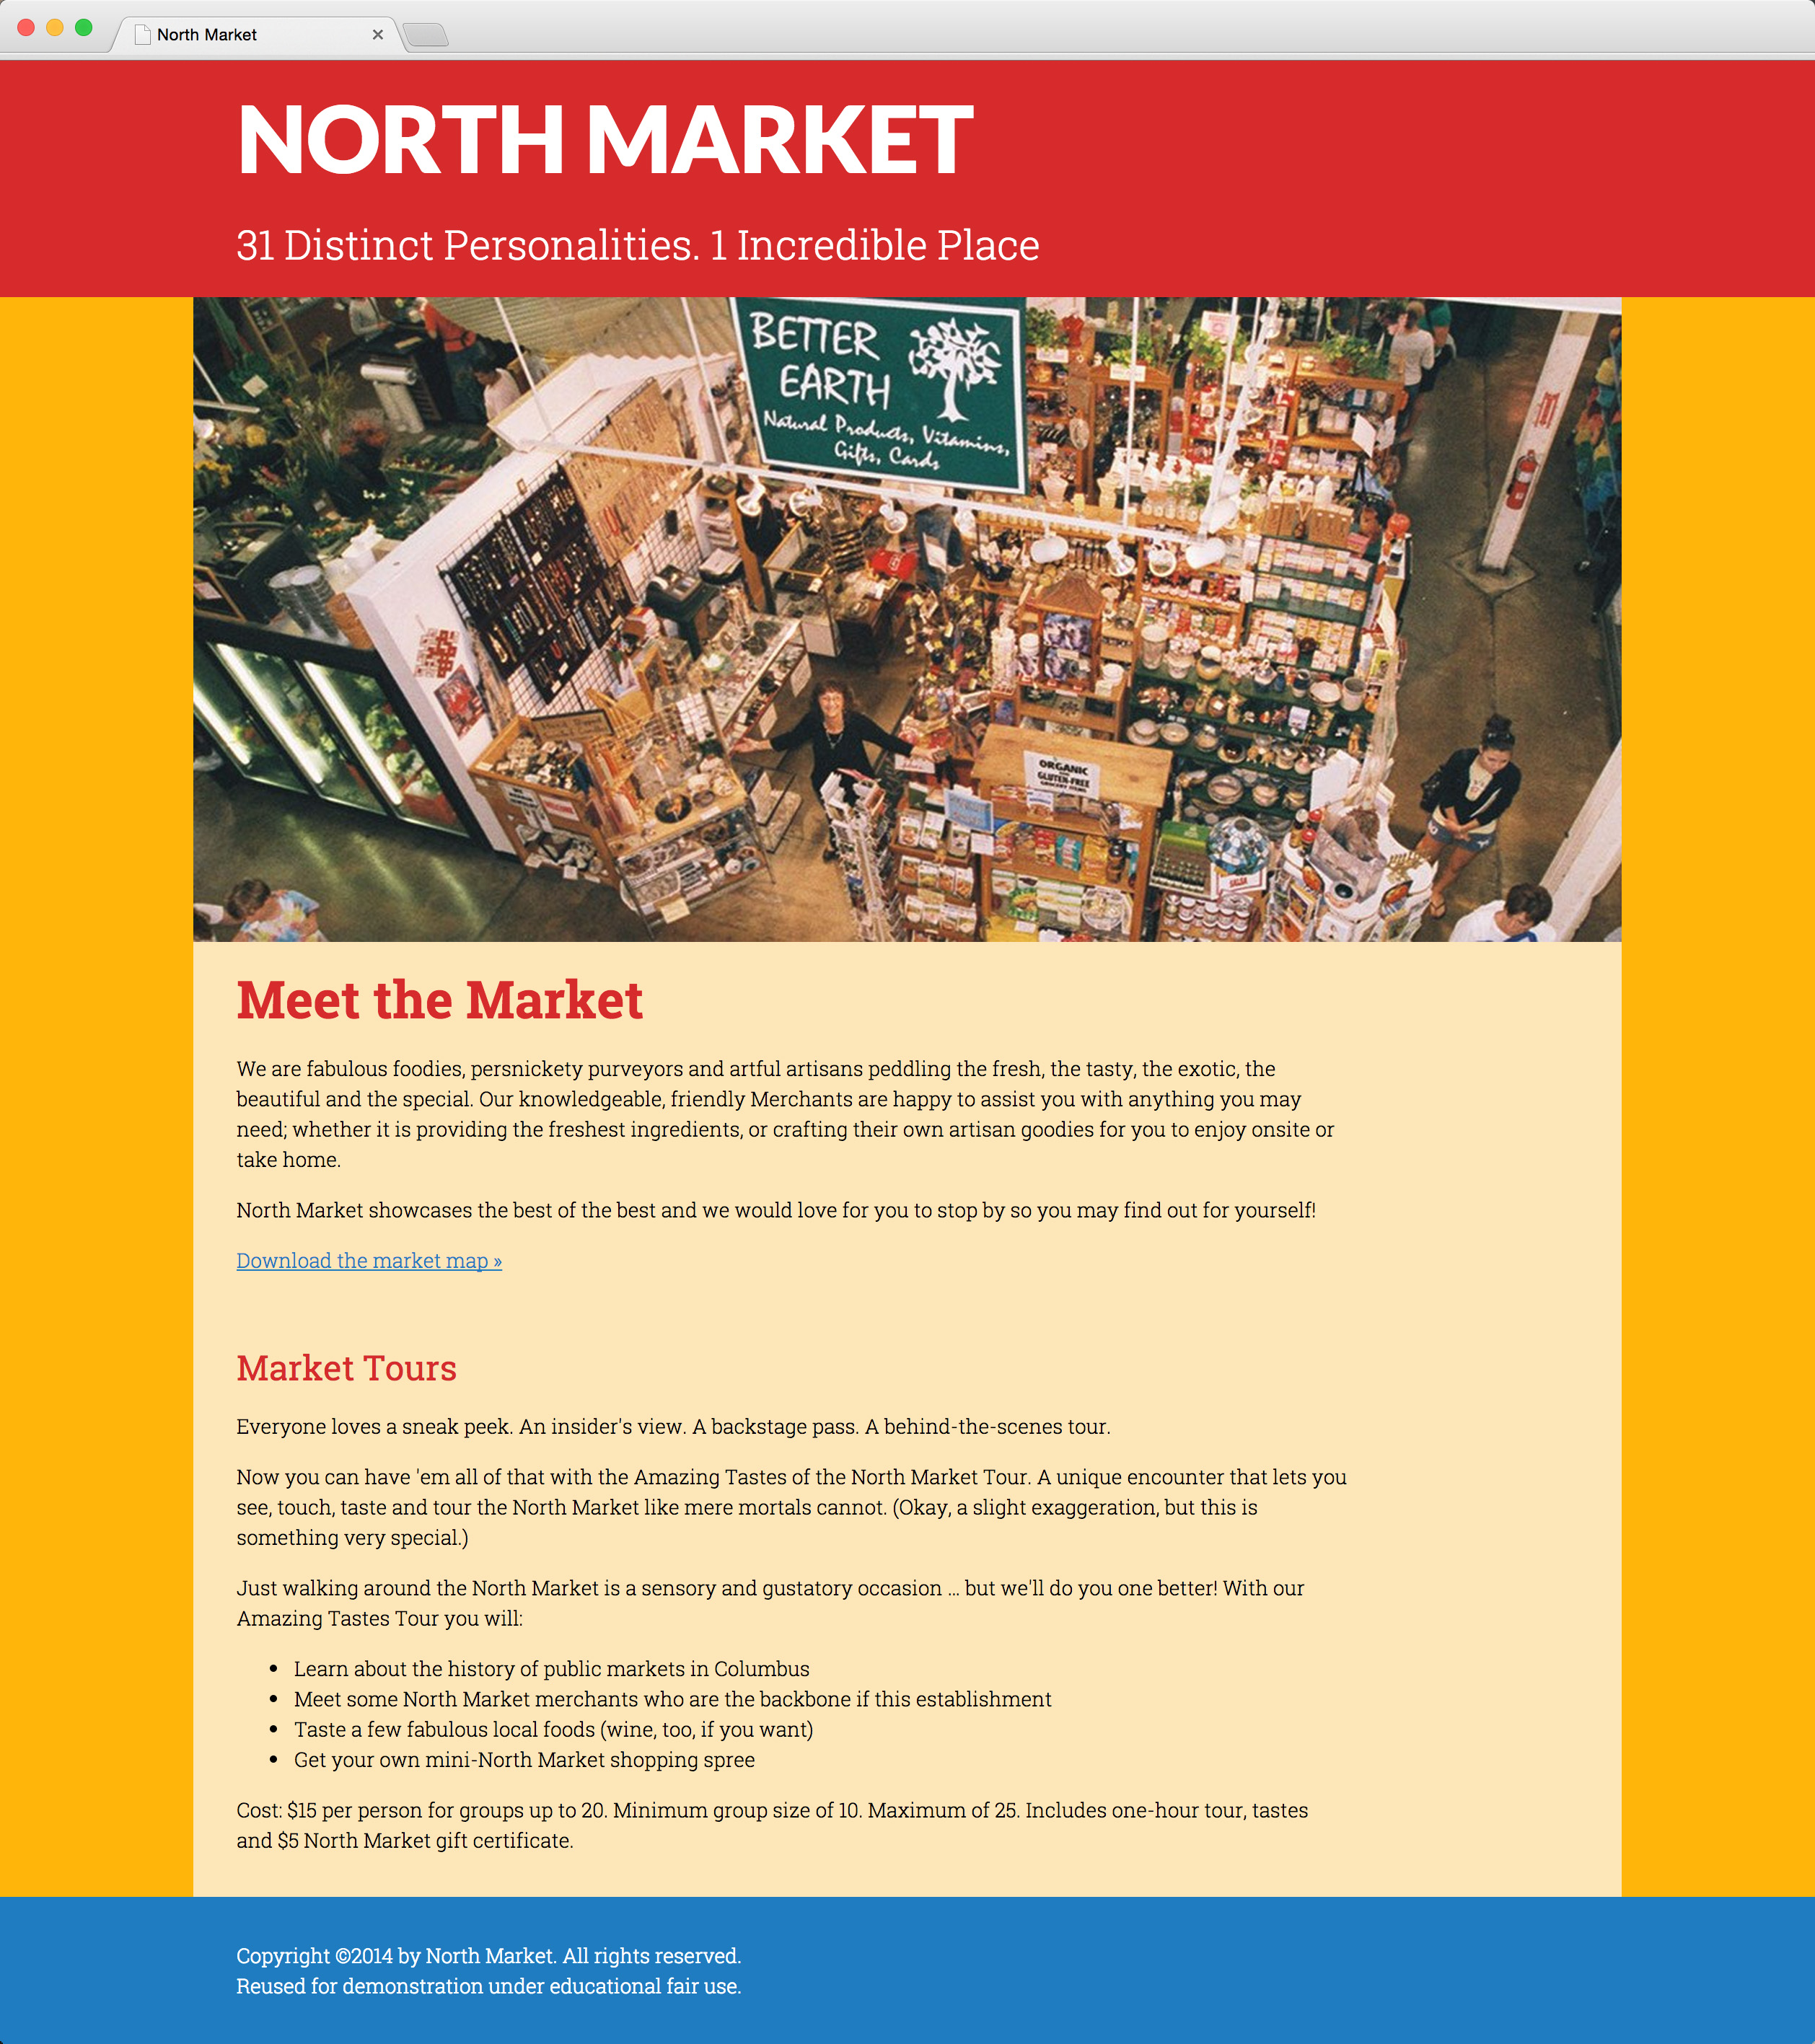
The most basic of websites today will typically have a set of page content filling a certain width and centered in the browser window, as pictured below.

This single-column layout is created by setting width on an element such as <body> and then using the auto setting for left and right margin:
body {
    width: 990px;
    margin: 0 auto;
}
This centering effect can also be used at other levels to create centered layout elements. In a situation like the one below, a <header> has a background color but has no width set, so it is filling the browser window’s width. Then an <h1> and a <p> inside it each have a width set along with auto margin on the left and right.
header {
    background-color: red;
}
header h1 {
    width: 930px;
    margin: 0 auto;
}
header p {
    width: 930px;
    margin: 0 auto;
}
Styling with Backgrounds and Other Effects
The 'background-...' settings...
...allow a variety of layering effects including laying text over a texture or image and creating tiling patterns.
Read Ch. 16 from Duckett
for details about how to work with images in CSS, including setting dimensions of images in your markup as well as how to add images as a background behind other HTML elements. You also get a preview of the float property, which we’ll discuss more in the next module. Note pp.413–416 in particular for a summary of the various settings that control backgrounds of boxes.When we design entire webpage layouts we often include visual effects that we need to export and use in our CSS as backgrounds on elements. Consider the backgrounds in the elements on this page:
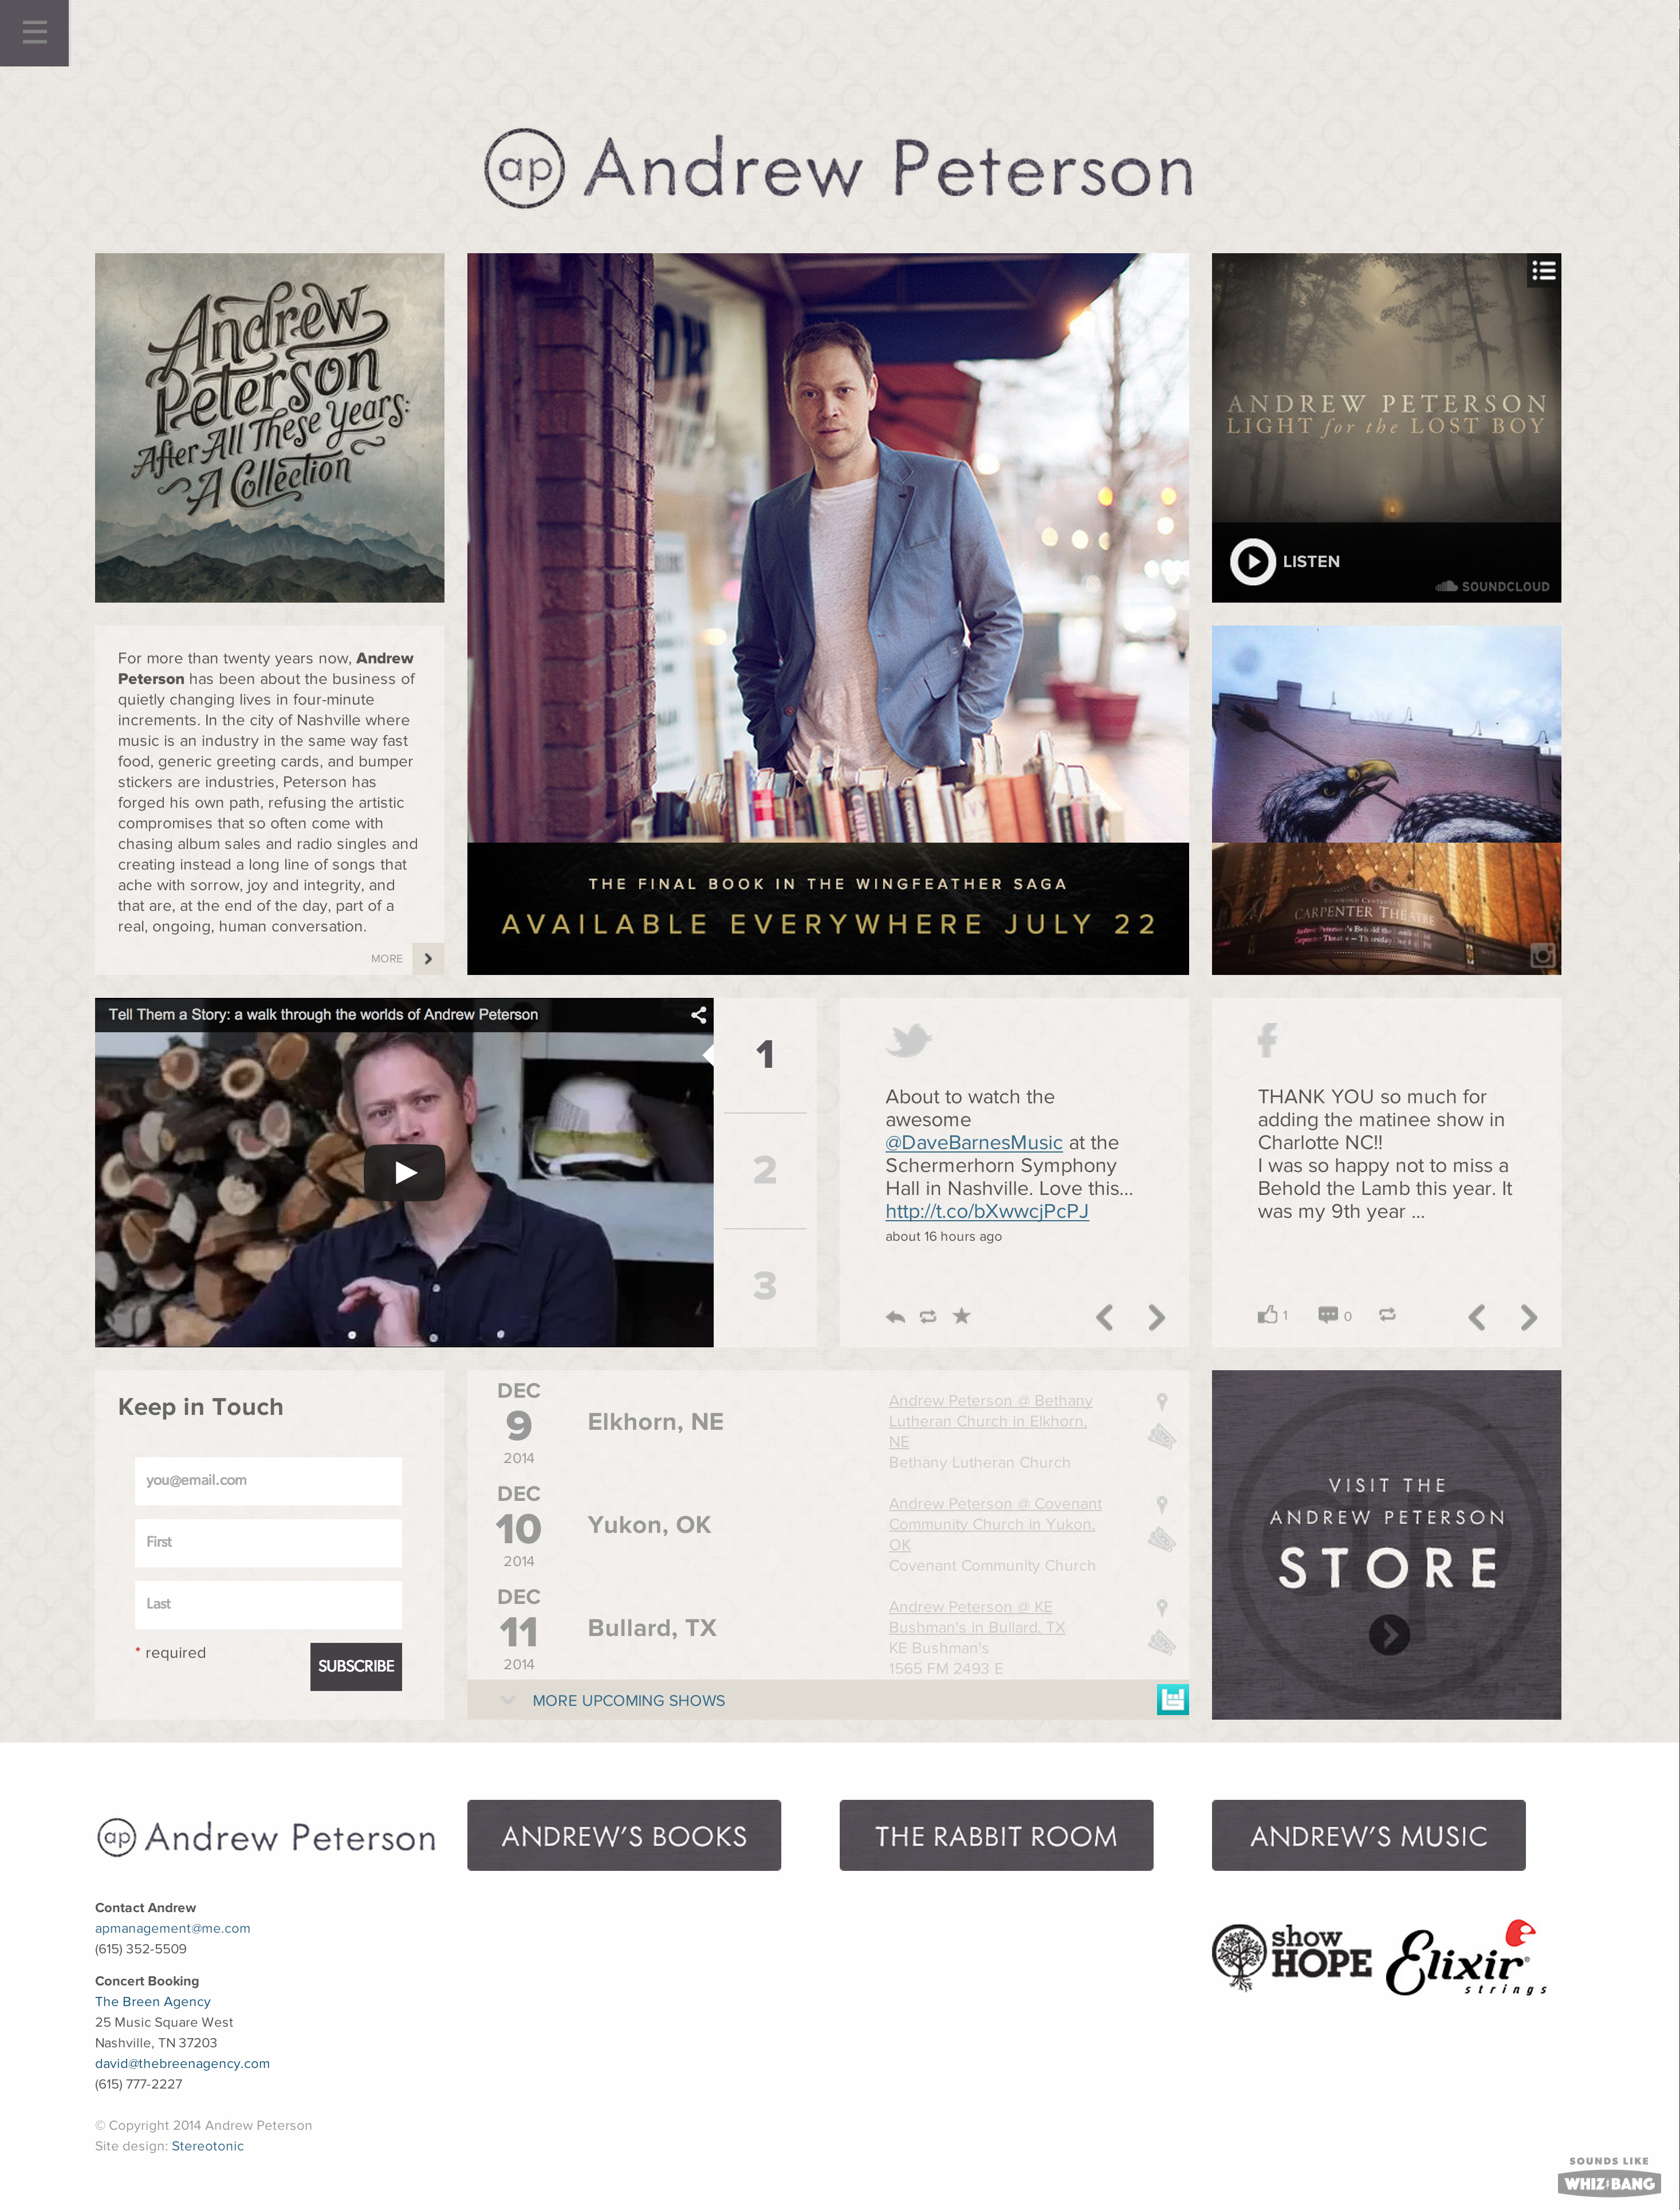
Here you can see a texture fills the browser window beyond the boundaries of the “page,” while a different texture sits directly behind each of the elements on the page. In this case the back-most texture is likely added onto the <body> tag (which fills the entire browser window), while each content module also has its own background image or color. Complex layering is very easy to accomplish thanks to the box model and the way elements contain other elements in HTML.
But in order to create these effects we must export images from our design comps successfully. Here are some things to consider:
- Backgrounds can tile in CSS so only export a small piece of a texture when that texture can repeat either in all directions, top to bottom, or left to right.
- Watch for images that layer on top of other textures. Rather than exporting the image and the texture, separate the two and export the top image on a transparent background. Then you can achieve the same layered effect using HTML and CSS.
- JPEG is a good default format to use for exporting slices unless they have transparency in which case PNG is likely the best so as to achieve smooth transparency and colors.
Other effects...
...such as border-radius and box-shadow allow us to further modify our box elements
Note these additional settings that help with decorating boxes:
border-radius— allows us to set rounded borders on elements. See this CSS Tricks article for more on how to use this and its variations.box-shadow— allows us to provide drop shadows of sorts on our boxes. CSS Tricks has a great demo of how to use this property.
More on Color in CSS
Read Ch. 11 from Duckett
for more details about working with color in CSS.Note pp.251–254 in particular where RGB, Hex, and RGBA are discussed. On p.254 Duckett brings up opacity and rgba. Note the following differences:
opacityis an actual CSS property that governs the transparency of the entire element selected. Therefore, useopacitywhen you want to make an entire element and its content semi-transparent.rgbais a potential color value you can use for thecolororbackground-colorproperties. It is therefore useful when you want to set just a semi-transparent color such as on a background.
Marketing and Search Engine Optimization
While not a major emphasis in this course, we do want you to be exposed to what happens after websites launch. In this sphere, focus can be placed on evaluating how well the site actually meets the intended goals. The last few chapters of Miller provide an overview of related topics.
Read Chapters 7–9 from Miller.
Study Tools
Prepare answers to the following questions as you study for the exam covering this lesson:
- What is search engine optimization and what are some techniques commonly used to accomplish this?
- What are conversions and what techniques are often used to ensure them?
Memorize each of the following CSS properties or values:
widthheightmarginpaddingborder-widthborder-styleborder-colorborderbackground-imagebackground-colorbackground-repeatbackground-positionbackground-attachmentbackgroundbox-sizingdisplay